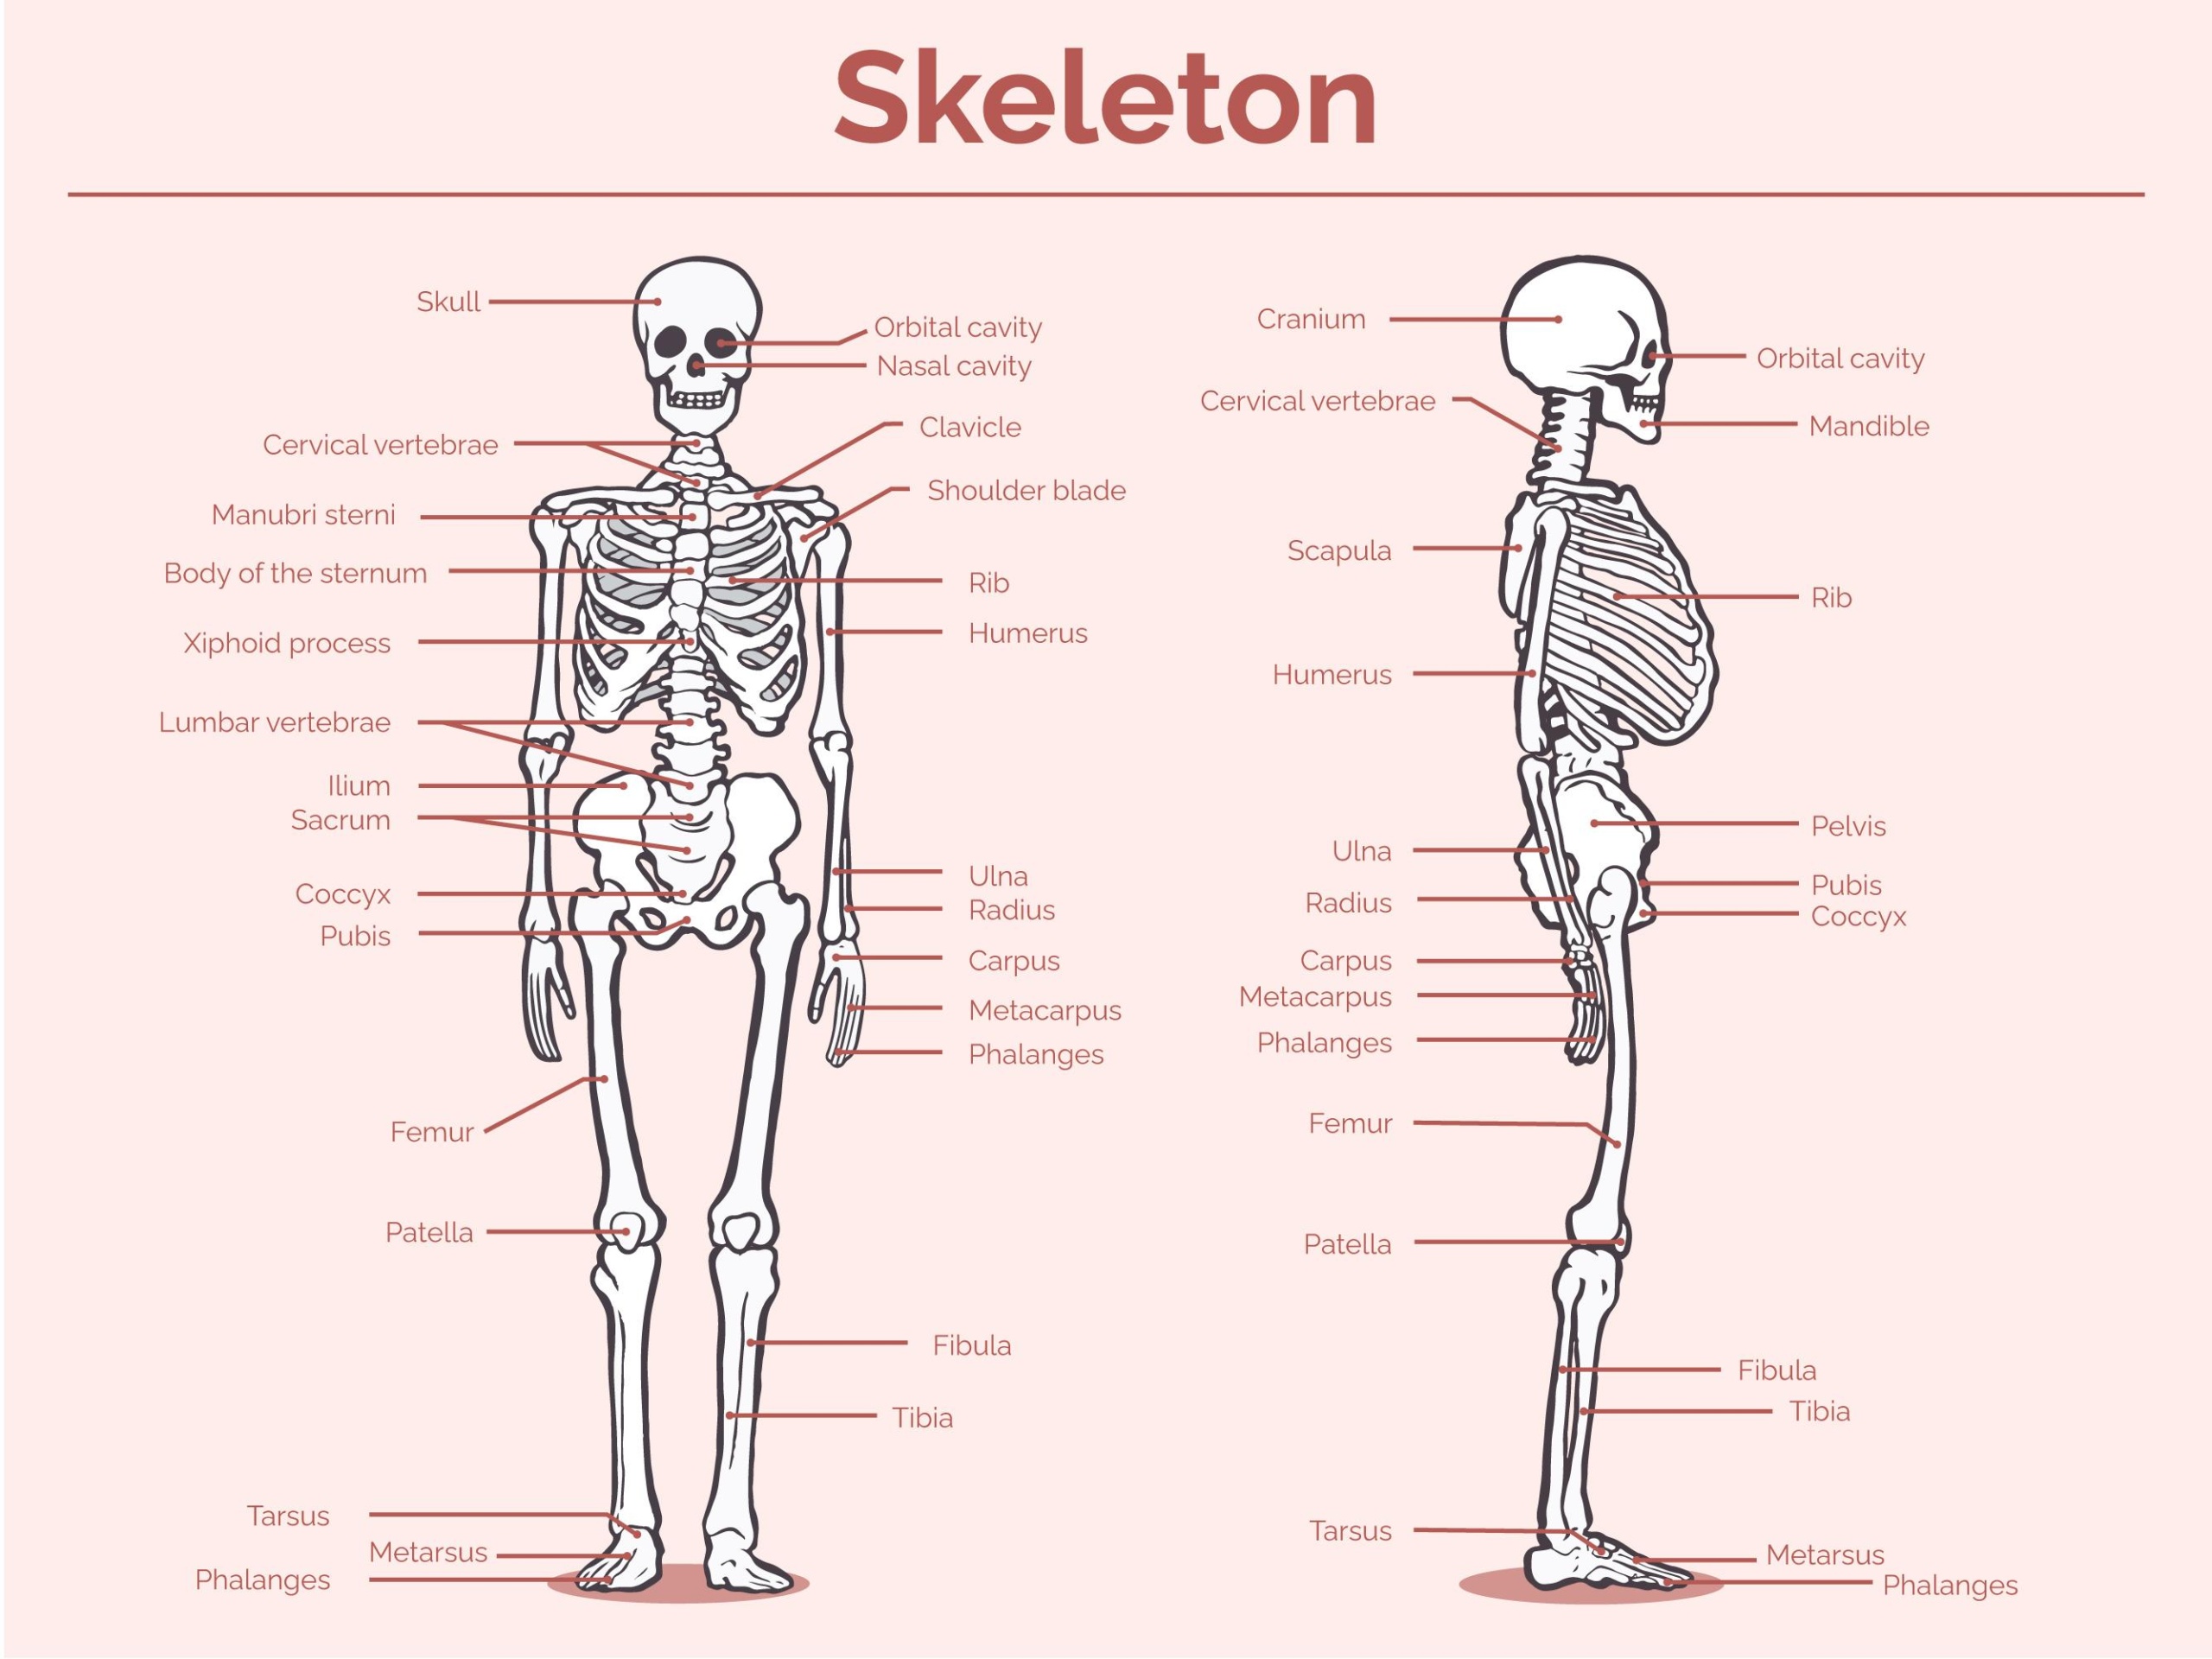
Title: Drawing a Skeleton: A Step-by-Step Guide to Mastering the Bones of the Body
Drawing a skeleton sounds like an eerie task, right? You can already imagine the skulls and crossbones, maybe even a spooky Halloween vibe creeping in. But, truth be told, it’s one of the most fundamental drawings you can master if you’re interested in understanding human anatomy or simply want to flex those artistic muscles. So, how do you draw a skeleton, label it, and make it look like something more than a pile of bones? Well, let’s break it down together.
The Basics: What Are We Drawing Here?
Before diving into the art itself, let’s pause and reflect on why we need skeletons in the first place. Think about your body for a moment. What gives you shape? What supports your organs, helps you stand tall, and makes sure you don’t just collapse into a mush of muscle and tissue? Yep, that’s right—the skeleton. It’s like the body’s own scaffolding. In total, the adult human skeleton has 206 bones (somewhere between 270 to 350 at birth, but they fuse as we grow). So when you’re drawing a skeleton, it’s not just about bones; it’s about understanding the structure, function, and location of each part.
Step 1: The Skull — The Crown Jewel
The human skull is the most iconic part of the skeleton, and it’s probably the most fun to draw. Start by sketching the basic oval shape of the head. From here, you can add some rough lines to indicate the jaw and the general proportions of the face.
- Top of the Skull: Draw a curved line at the top to show the cranium, which houses the brain.
- Cheekbones: Add two lines on the sides of the face to mark where the cheekbones lie.
- Jaw: Sketch the jaw with a slight slant to give it that realistic touch. Don’t forget the teeth area if you want to be extra detailed.
Once the basic shape is in place, you can go ahead and add the smaller details such as the eye sockets, the nasal cavity, and the mouth. Make sure to get the proportions right—eyes are typically located about halfway down the skull, while the nose and mouth follow the vertical axis.
Label It: Skull, Nasal Cavity, Eye Socket, Cheekbones, Mandible (Jaw), Maxilla (upper jaw), and Parietal Bone (side of the head).
Step 2: The Spine — A Backbone to Rely On
The spine is the central column of bones that runs from the neck to the lower back. Drawing the spine might sound complicated, but it’s all about understanding its “S” shape. Begin with a series of small, stacked oval shapes for the vertebrae. The cervical vertebrae (neck), thoracic vertebrae (middle back), and lumbar vertebrae (lower back) each have distinct sizes, so make sure to vary the shapes accordingly.
- Cervical Vertebrae: These are smaller, located at the top of the spine.
- Thoracic Vertebrae: Larger and connected to the ribs.
- Lumbar Vertebrae: These are the biggest, supporting most of the body’s weight.
Add lines for the discs that separate the vertebrae. You don’t have to get too detailed here, but knowing that there are 24 movable vertebrae in the spine will help you place them accurately.
Label It: Cervical Vertebrae, Thoracic Vertebrae, Lumbar Vertebrae, Spinal Cord, Vertebral Column.
Step 3: The Ribcage — Breathe Easy
Once the spine is done, you’ll need to add the ribs. The ribcage is like a cage that protects your heart and lungs. To draw the ribs, imagine a rounded structure that encircles the chest. You can draw a series of curves starting from the spine and going outward to form the ribcage.
Start with a simple arc that extends outward on either side of the spine, then add smaller rib bones that angle towards the sternum (the breastbone). Ribs are curved, so try to keep the shape fluid and rounded.
Label It: Rib, Sternum, Thoracic Cage.
Step 4: The Arms and Hands — Get a Grip
Now that the upper body is set, it’s time for the arms and hands. Begin by drawing the humerus (upper arm bone), which connects to the shoulder. From there, draw the radius and ulna (forearm bones). These bones don’t just float—there are elbow joints that connect them.
To make the hands, focus on the basic structure first. The phalanges (fingers) might look complicated, but you can break them down into three parts for each finger (except for the thumb, which has two). Draw the palms and connect the fingers.
Label It: Humerus, Radius, Ulna, Carpals (wrist bones), Phalanges, Metacarpals (hand bones).
Step 5: The Pelvis and Legs — Standing Strong
The pelvis is the base of support for your upper body, and it connects to the femur (thigh bone). The pelvic girdle is wide and bowl-shaped, so try to draw it with two distinct halves curving outwards.
After you’ve added the pelvis, move to the legs. Draw the femur, which is the longest bone in the body, followed by the patella (kneecap). For the lower leg, add the tibia (shinbone) and fibula (the smaller bone beside it). Finally, sketch the feet, paying attention to the arch and toes. Feet are like hands, but they serve as the foundation of your entire body, so make them sturdy!
Label It: Pelvis, Femur, Patella, Tibia, Fibula, Tarsals (foot bones), Phalanges (toes), Metatarsals.
Step 6: Add the Final Touches
After all the bones are drawn, it’s time to add any final details. You can add muscle groups or joint connections. Use lines to show how the bones articulate at the joints, like the shoulder joint, knee joint, and ankle joint. You don’t have to get too caught up in perfecting the muscles, but just a basic outline will make the skeleton look more lifelike.
Also, think about the bones that aren’t directly visible in a drawing, such as the hyoid bone (in the neck) or the coccyx (tailbone). These are small but important.
Final Labels: Bone Markings, Joint Areas, Cartilage, Ligaments.
Conclusion: The Art of Skeletons
Now, you’ve got your skeleton all drawn and labeled. But remember, the human body is far more complex than just a skeleton. Understanding how the bones, muscles, and joints work together is what makes anatomy such a fascinating field of study. It’s not just about the lines and labels on a page; it’s about understanding the intricate structure that holds us upright and allows us to move, breathe, and live.
So, whether you’re a student of anatomy, an artist, or just someone fascinated by the human body, drawing a skeleton is more than just an exercise in pencil strokes. It’s a chance to appreciate the intricate engineering of the human form, a kind of appreciation for the body that goes far beyond the surface.
Happy drawing!